Mirrors are more than just functional pieces; they’re true game-changers when it comes to spring decor. A well-placed DIY statement mirror can instantly brighten a room, making it feel fresher and more alive. One personal learning? I once bought a giant mirror from a well-known store only to realize it blocked the natural sunlight—lesson learned! Now, I focus on how mirrors reflect light to lift the whole space. As interior designer Jane Smith says,
“Mirrors amplify natural light, turning any dull corner into a radiant focal point.”
Trying simple mirror projects can be a blast. Think fun shapes, splashy frames, or even adding pastel hues that scream spring! Start small—an oval mirror framed with twine or a geometric arrangement can transform your room without draining your wallet. Remember, it’s not about perfection. It’s about embracing the sparkle and quirks of your personal style while inviting more joy and light into your home.
Choosing the Perfect Mirror Shape and Size
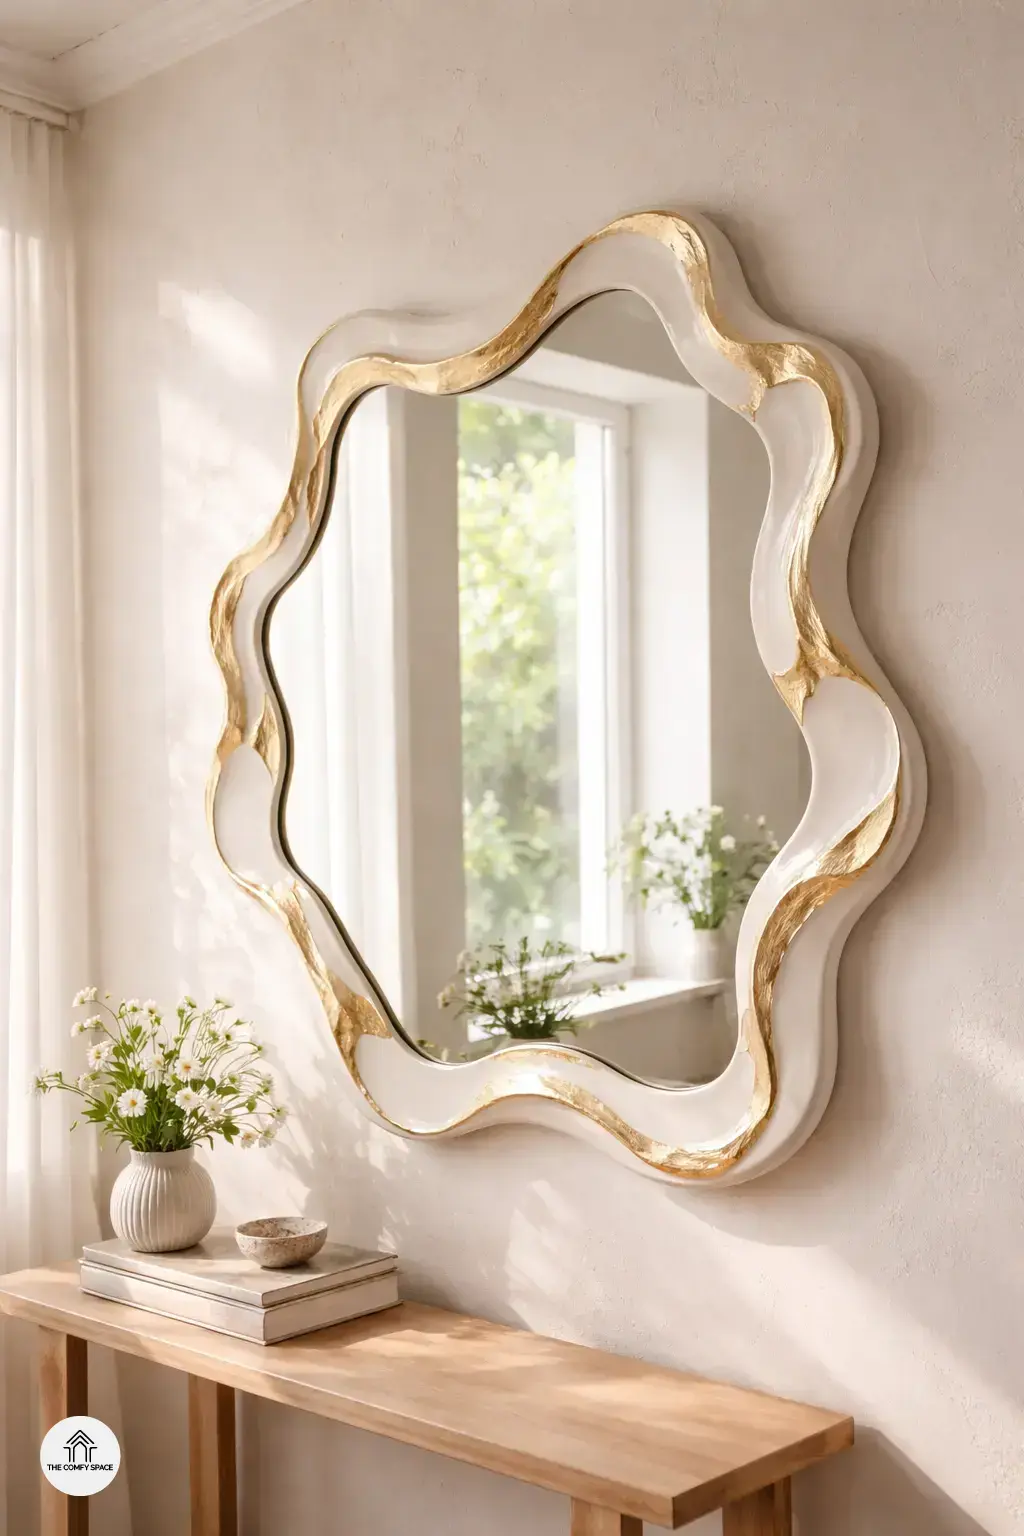
When choosing the perfect mirror shape and size, it’s all about matching the vibe you want to create. Exploring trendy shapes like round, sunburst, and geometric mirrors can instantly add personality to any room. Round mirrors bring softness and balance, while sunburst designs add a punch of vintage flair. Geometric shapes, on the other hand, offer a modern, artsy touch that makes your space pop. “The right mirror doesn’t just reflect light; it reflects your style,” interior designer Jane Smith says, emphasizing how a well-chosen shape can become a true statement piece.
Sizing your mirror properly is just as crucial. For larger walls, opt for bigger mirrors or cluster smaller ones for visual interest. In cozy spaces, a modest-sized mirror can prevent the room from feeling cramped. Remember, the mirror’s shape dramatically impacts the overall atmosphere—soft curves can evoke calm, angular lines bring energy. When I first tried placing a giant geometric mirror in my tiny hallway, I learned that scale and placement are everything. It’s a fun experiment, and with some trial and error, you’ll nail the perfect look!
Creative Frames That Make a Statement
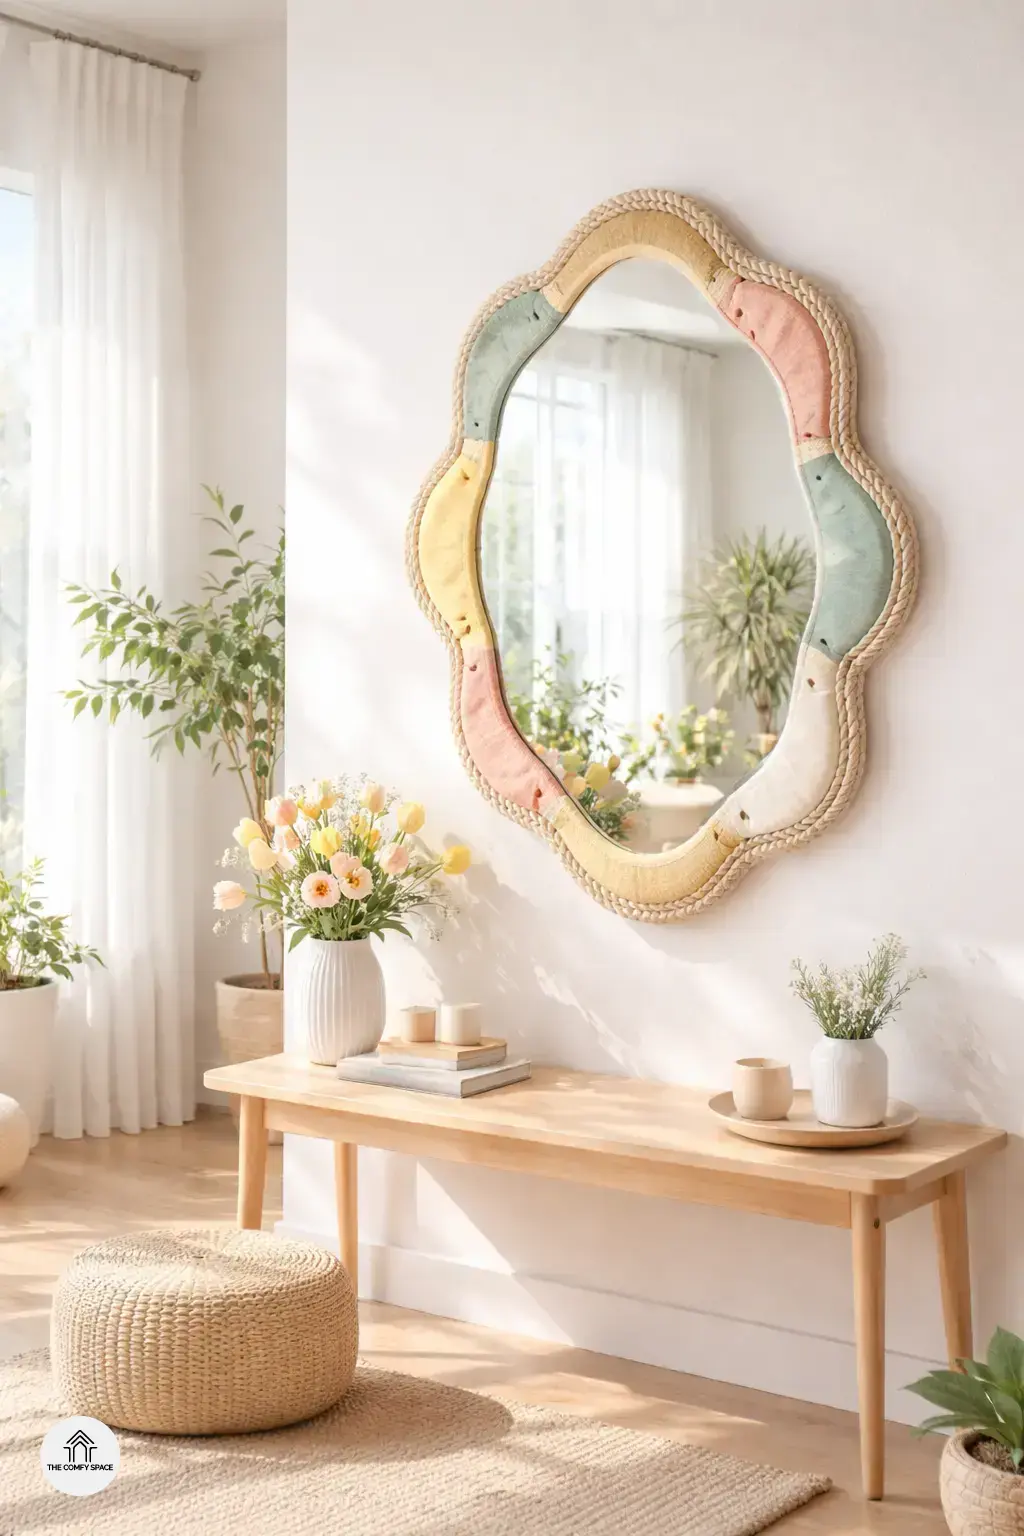
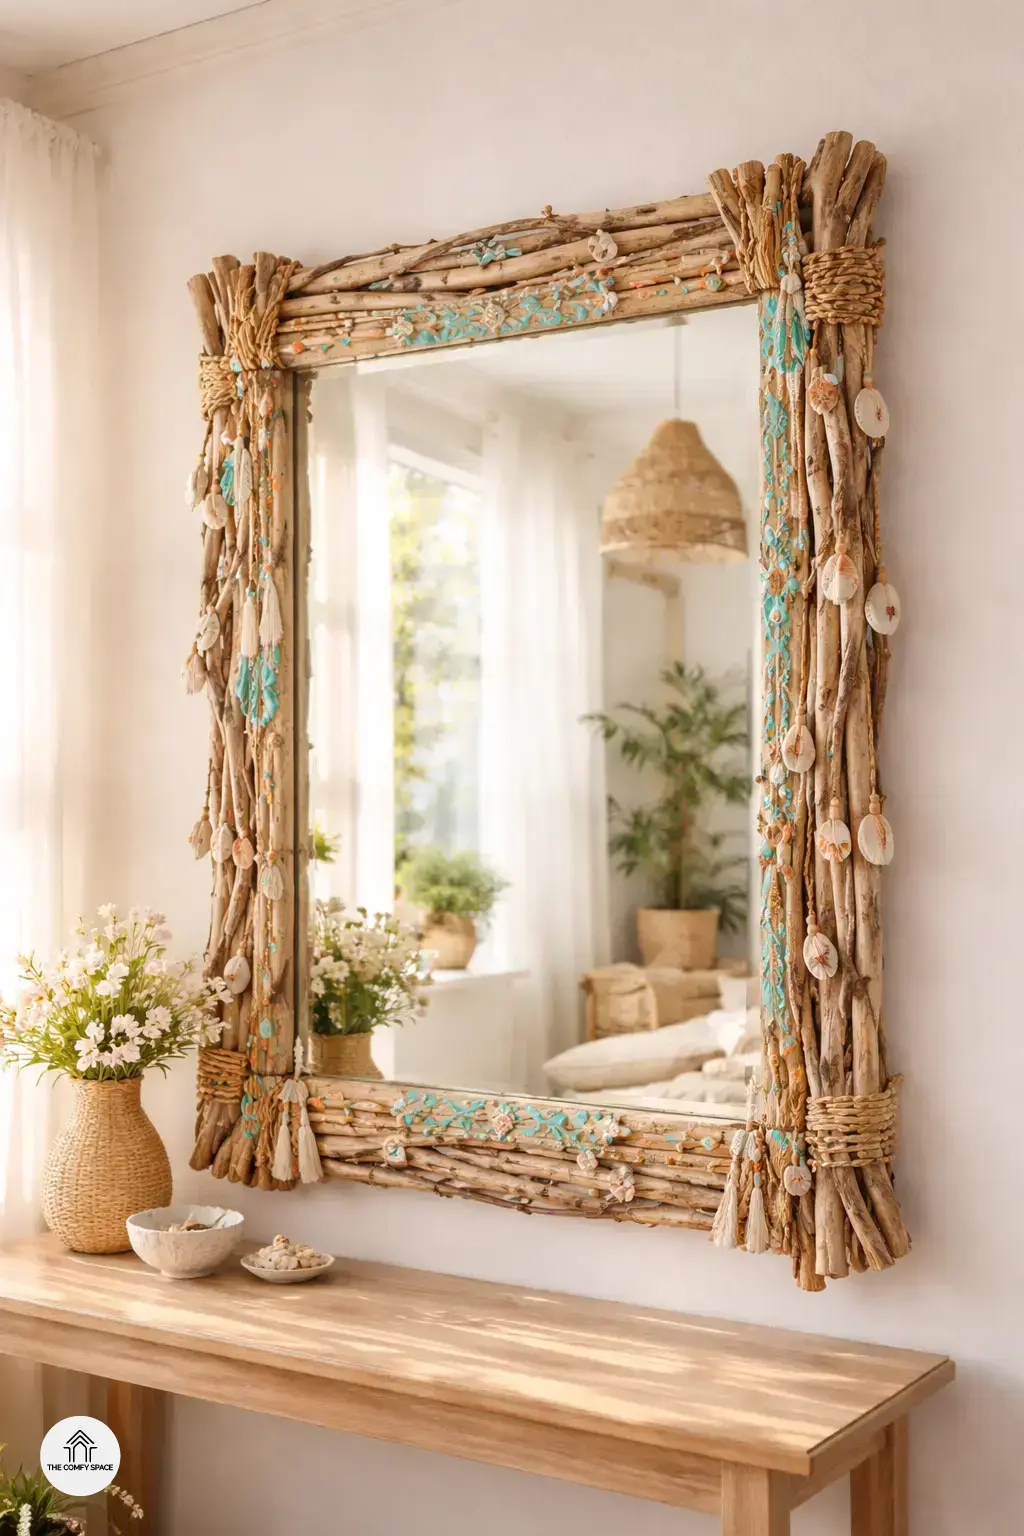
Getting creative with frames is the secret to making your DIY statement mirror truly pop. Using natural materials like driftwood or rattan adds a breezy, spring vibe that feels fresh and organic. I once tried to glue shells onto a frame and ended up with a sticky mess, but hey, that’s how you learn, right? “Adding personal quirks transforms a simple piece into an art form,” design expert Lisa Monroe says.
If you’re feeling extra bold, painting old frames with vibrant colors or funky patterns can instantly lift your room’s mood. Don’t shy away from mixing beads or shells for an eclectic twist. Just remember: it’s all about having fun and reflecting your style—imperfections included!
Placement Hacks for Maximum Light and Style
Finding the best spots to hang your statement mirrors can instantly boost your spring vibe indoors. Aim for walls opposite windows to bounce natural light beautifully around the room. Trust me, I once placed a mirror too low and ended up with awkward reflections and a neck cramp! “Positioning your mirror at eye level ensures both function and style,” design expert Jamie Lee says. Plus, steering clear of cluttered walls keeps your décor feeling fresh and breathable.
Want to add some extra charm? Pair your mirrors with thriving plants or favorite art pieces. The greenery adds life, while art infuses personality—like a snapshot of spring inside your space. Don’t be shy to experiment, but remember, balance is key. Throw in a few of your own ‘oops’ moments; they’re all part of the journey to mirror magic!
Real-Life DIY Challenges and How to Overcome Them
Taking on a DIY mirror project sounds fun until you face uneven walls that laugh at your perfectly measured marks. I learned the hard way that a level, patience, and some creative mounting hacks are your best friends here. “Uneven surfaces are just a puzzle waiting to be solved,” designer Lisa Martin says. Don’t let a wonky wall stop you; adjust your mounting strategy with adhesive strips or custom brackets to keep your mirror secure and stunning.
Then there’s the art of choosing materials. Sure, it’s tempting to splurge on glamorous frames, but I found affordable thrifted items and spruced them up with paint and gold leaf that screamed high style on a budget. And let’s be honest, who hasn’t glued a piece upside down at first? It’s all part of the ride! Embrace those initial oops moments—they teach you and make the process way more memorable.